Description
The relay enables bidirectional communication between Microsoft Teams or your website and your Matrix42 environment. It can be hosted either as a Windows service or as a Docker container. The relay can also be used by Matrix42 systems that do not have direct internet access.
Hosting Options
Windows Service
- The Windows service can be hosted in the public cloud on a Windows server in the DMZ or on the app server if it is accessible from the Internet.
Docker Container
- The Docker container can be hosted in Azure or in the DMZ.
Requirements
- The application server requires access to the relay.
- The relay must be accessible both from the Matrix42 application server and, if necessary, from Microsoft.
- The relay should be published via TLS/Https, ideally via a load balancer with WebSocket reverse proxy function.
- Service Desk Chat Relay Binaries
- Contact Labtagon product support to obtain the relay binaries. If you want to host a Docker container, you can either use „labtagon/service-desk-chat-relay:latest“ as image or contact our product support to get information about the latest version. Please note that with „labtagon/service-desk-chat-relay:latest“ the image is automatically updated as soon as we release a new version.
Creating the Azure bot for the Microsoft Teams Relay
You can create the Azure bot via your Azure portal. If you still need help with our documentation, please refer to the following article from Microsoft (Create a bot in Azure – Bot Framework Composer | Microsoft Learn). If you still need help, you are welcome to contact our support team. You must perform the following steps to create your Azure bot:
- Create a resource:
- Navigate to the Azure-Portal (https://portal.azure.com/) and create a new resource.
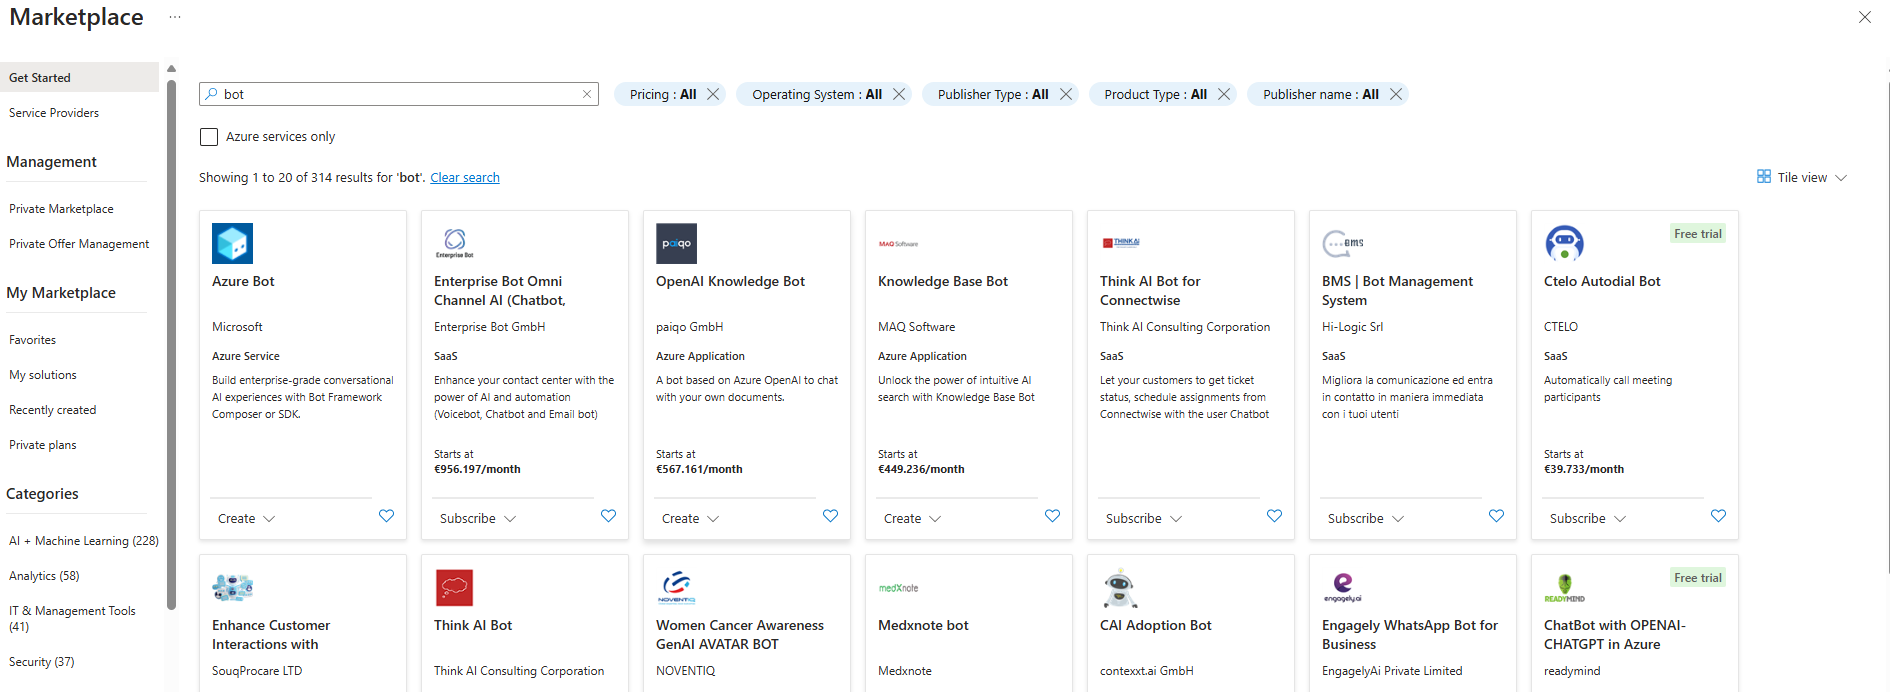
- Select „Bot Services“ and create a new Azure Bot.
- Create a bot:
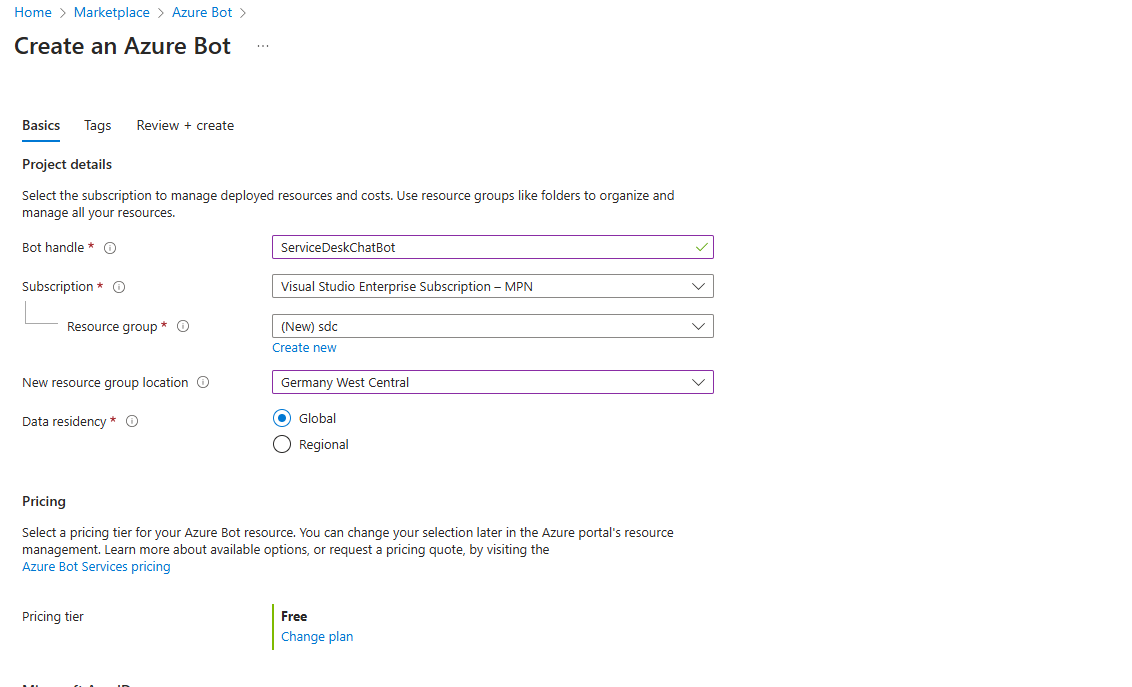
- Enter the technical name of the bot under Bot handle. This name is not displayed to end users.
- Select the subscription and the resource group.
- Change the data residency to your desired option.
- Switch to the free pricing tier.
- Select the „Single Tenant“ option.
- Generate a new Microsoft App ID or store an existing app. Make a note of the appId as it is required for the configuration.
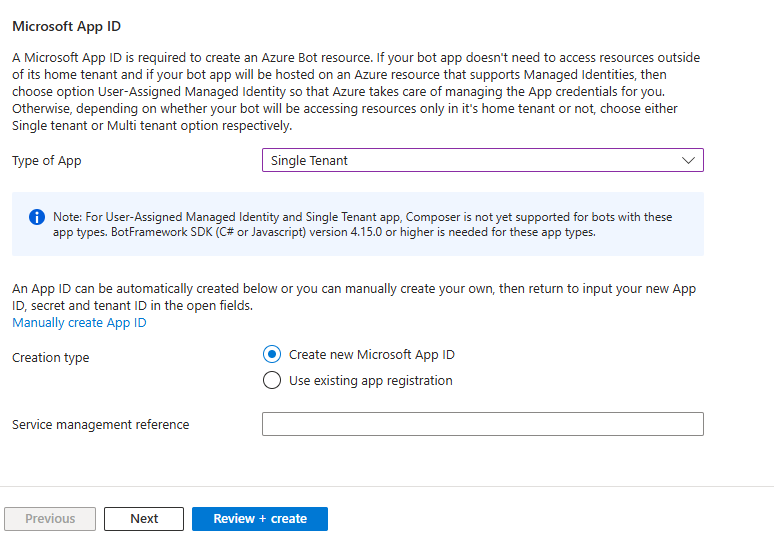
- Click „Review + create“.
- Annual update of the app password:
- Please note that the app password must be renewed every year.
- Configure bot profile:
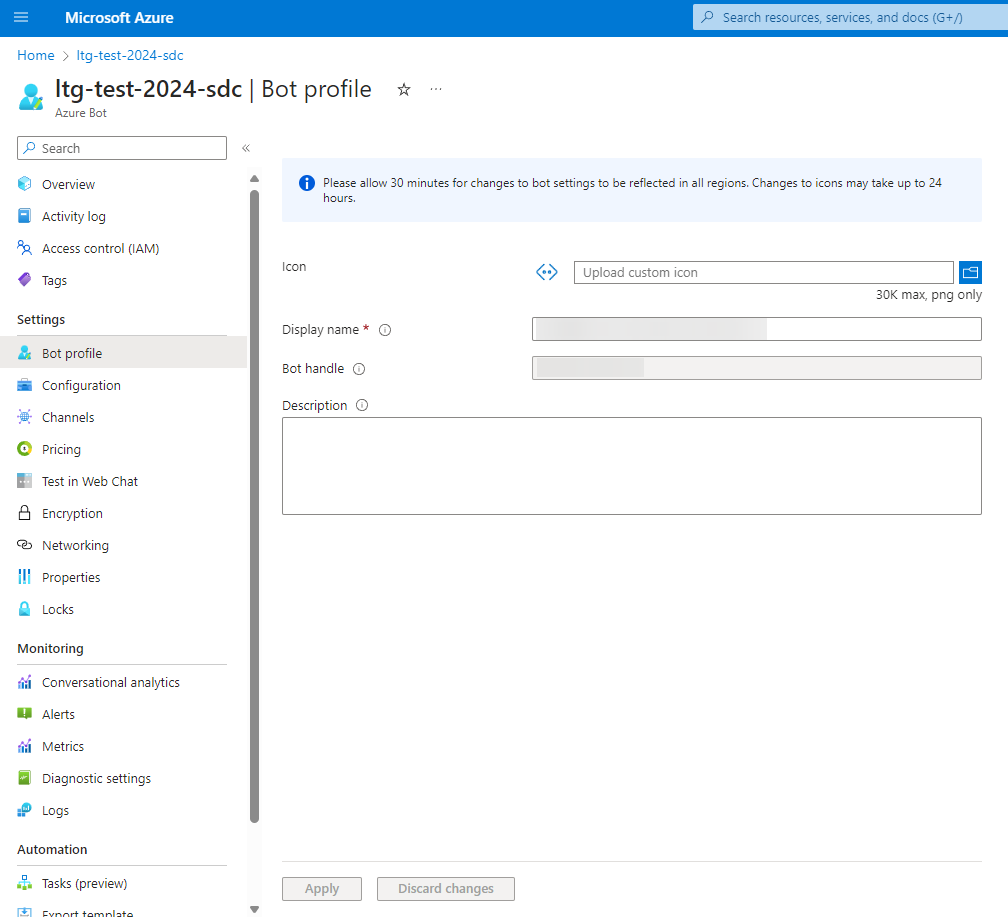
- Give your bot a name and select a suitable icon.
- Please note that the name and icon can not be changed afterwards.
- Configuration of the endpoint:
- Go to the configuration and copy the endpoint URL of the relay with the addition „/api/messages“. In the example below with the Windows service, this would be „/teams/api/messages“.
- Activate the streaming endpoint.
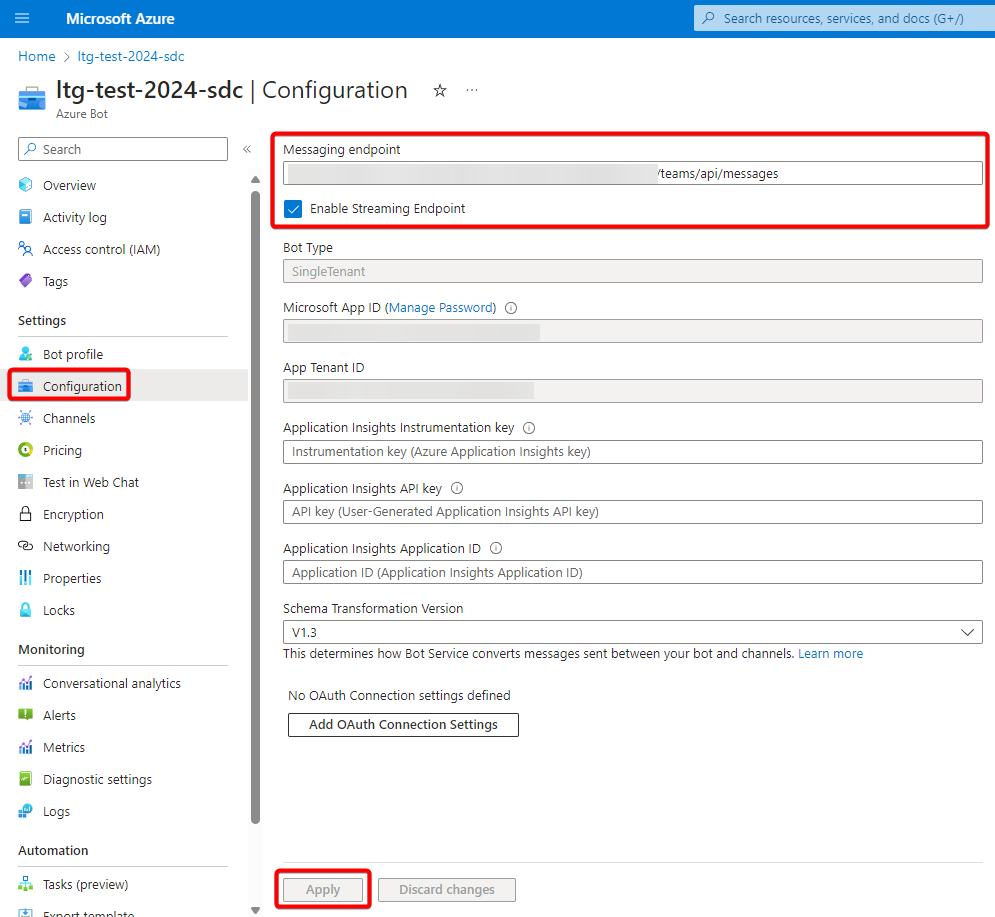
- Also configure a reverse proxy on it.
- Add teams – Commercial:
- Add Microsoft Teams as a channel to the bot and select the commercial version. You will then find the channel under available channels.
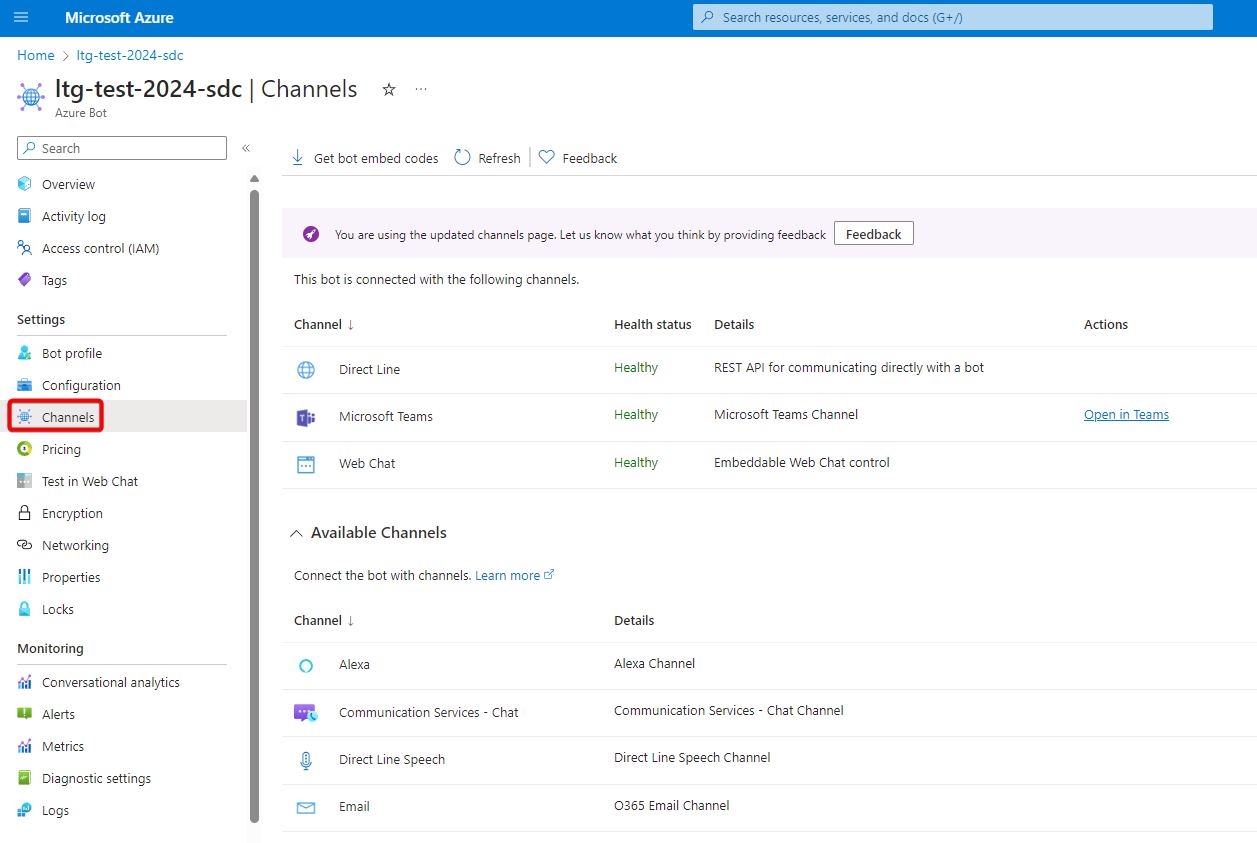
- Generate Client Secret:
- Go to Configuration and select „Manage Password“.
- Generate the client secret and copy the generated value.
Microsoft Teams app creation
This guide will help you to create a Microsoft Teams app. This app will automatically open the bot’s chat. Please note that the bot can only be used once the Azure bot and the relay have been fully configured; the „Configuration of a Windows service“ step may still be necessary.
First open the Microsoft developer portal in Teams. If you have not yet installed the developer portal, download it.
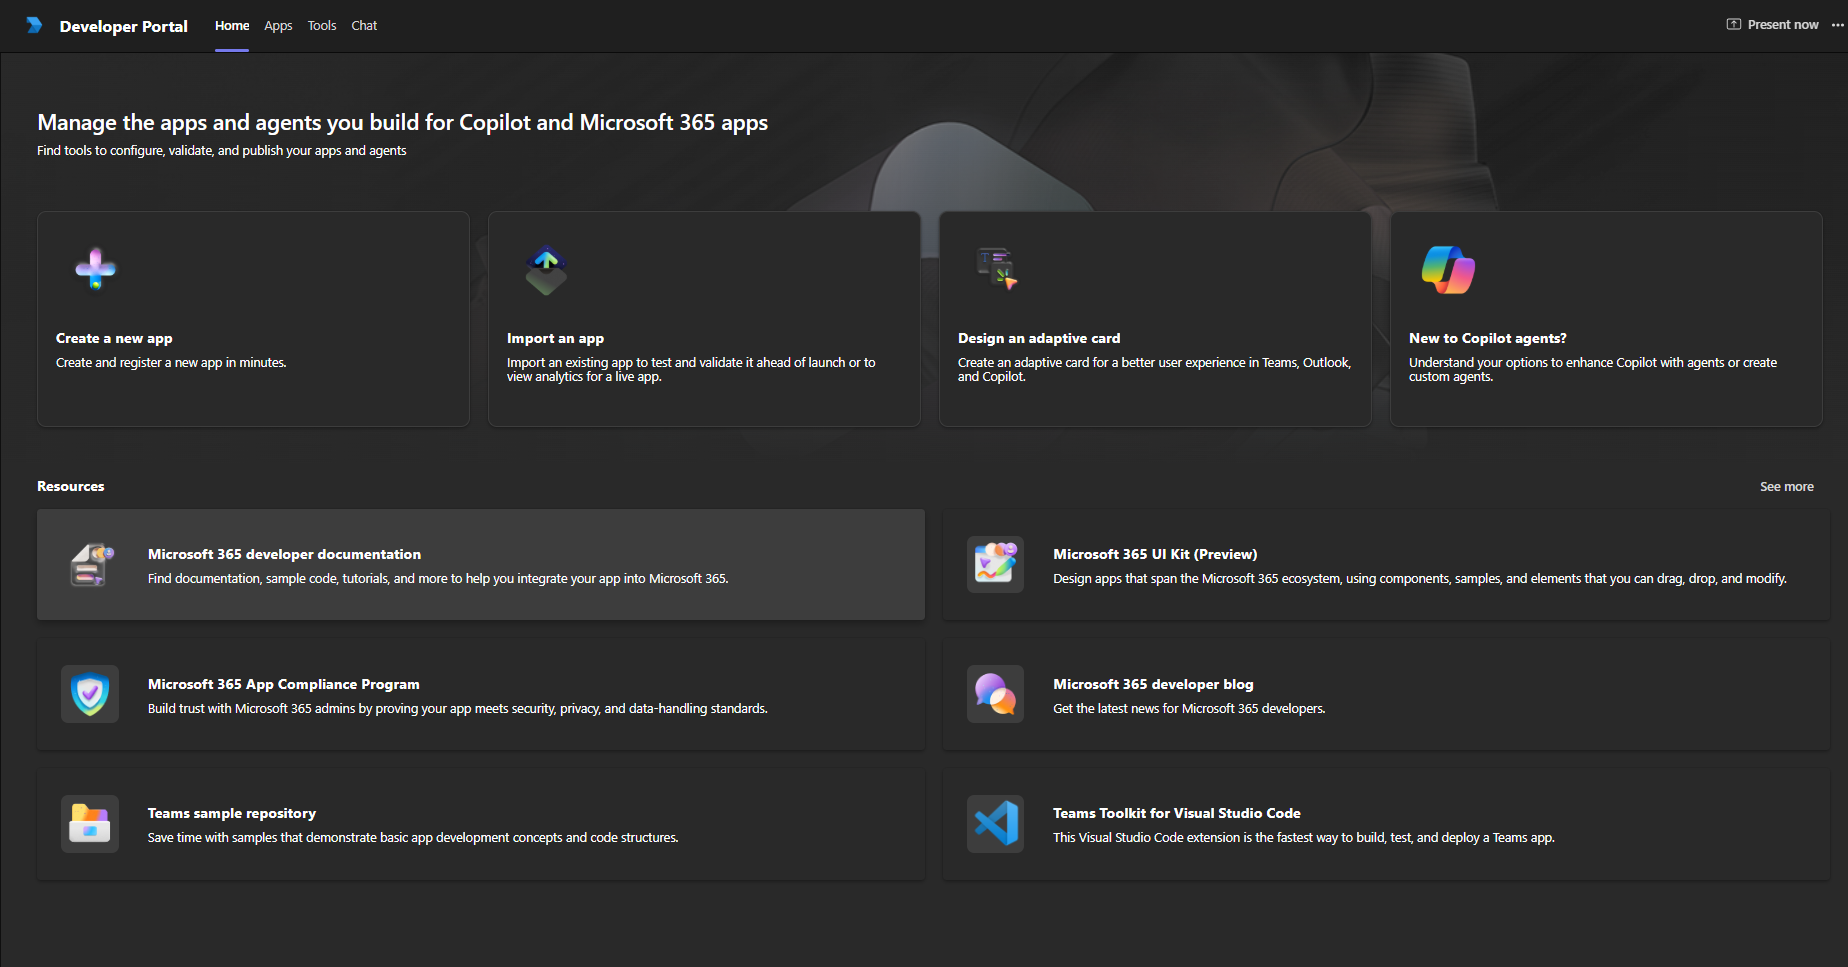
Then go to the Apps tab in the developer portal and create a new app.
Once you have clicked on the „New app“ button, the following view opens. You must enter the name of your app there. This name will be displayed to end users as the app name, e.g. Calendar.
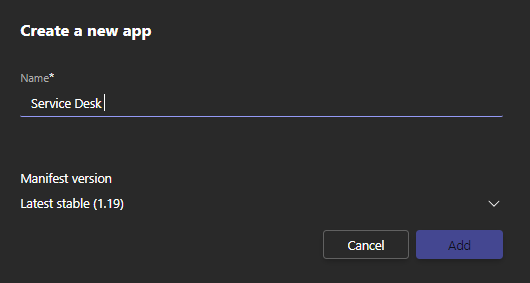
Then click on Add and the following view will open. There you can enter the general information about your app under „Basic information“.
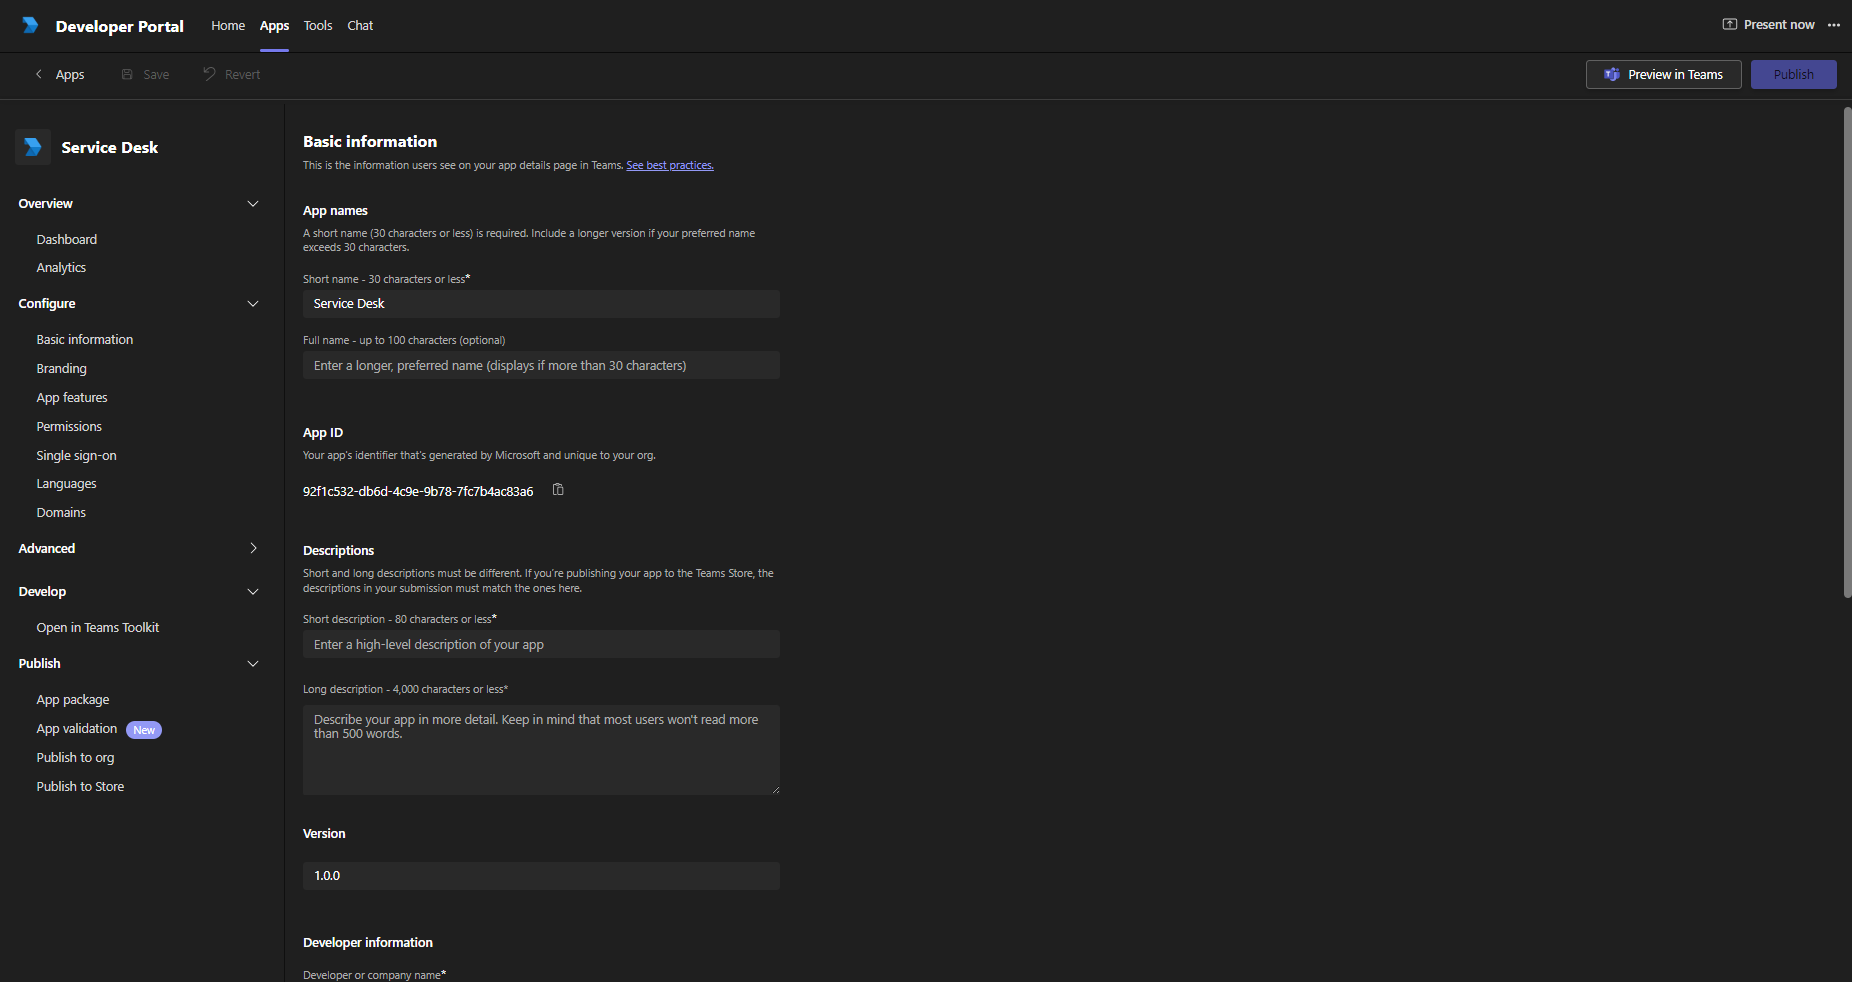
You can obtain the application client ID from the Azure portal. To do this, go to your bot and click on Configuration. Copy the Microsoft App ID and paste it under Application Client ID.
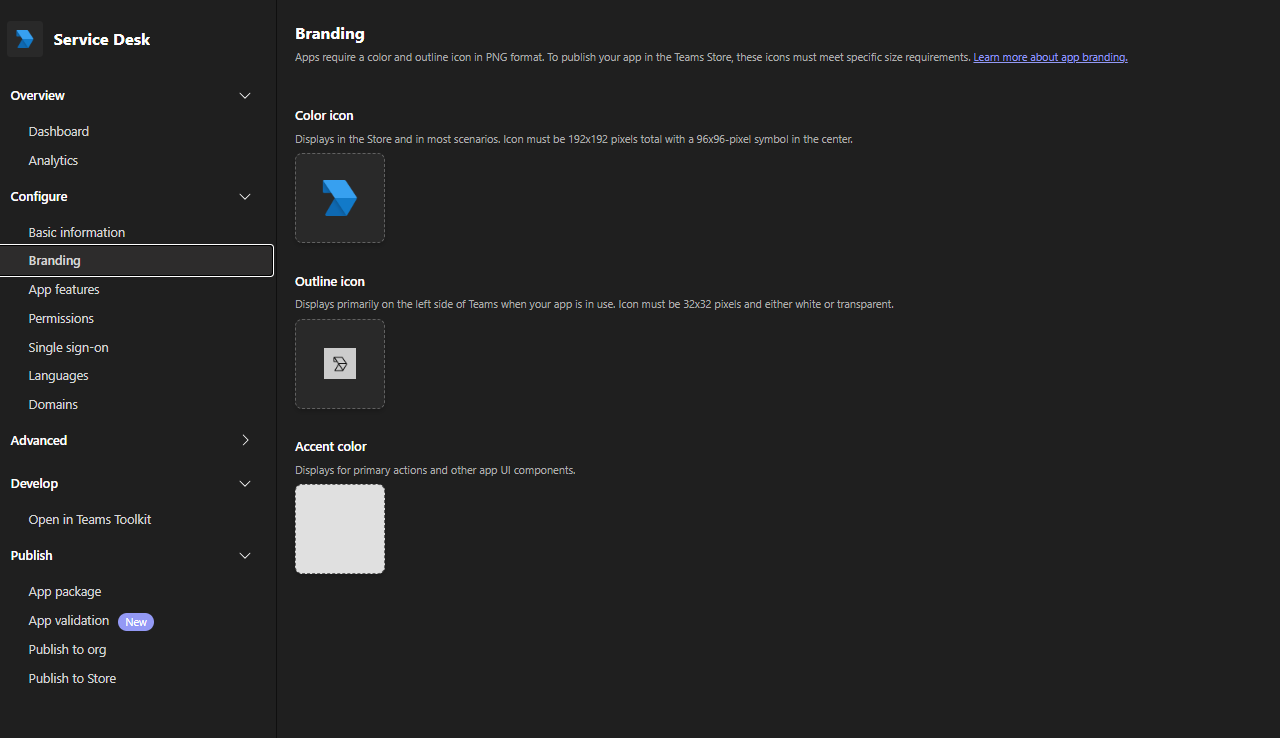
You can define the symbols/icons for the app in the „Branding“ tab.
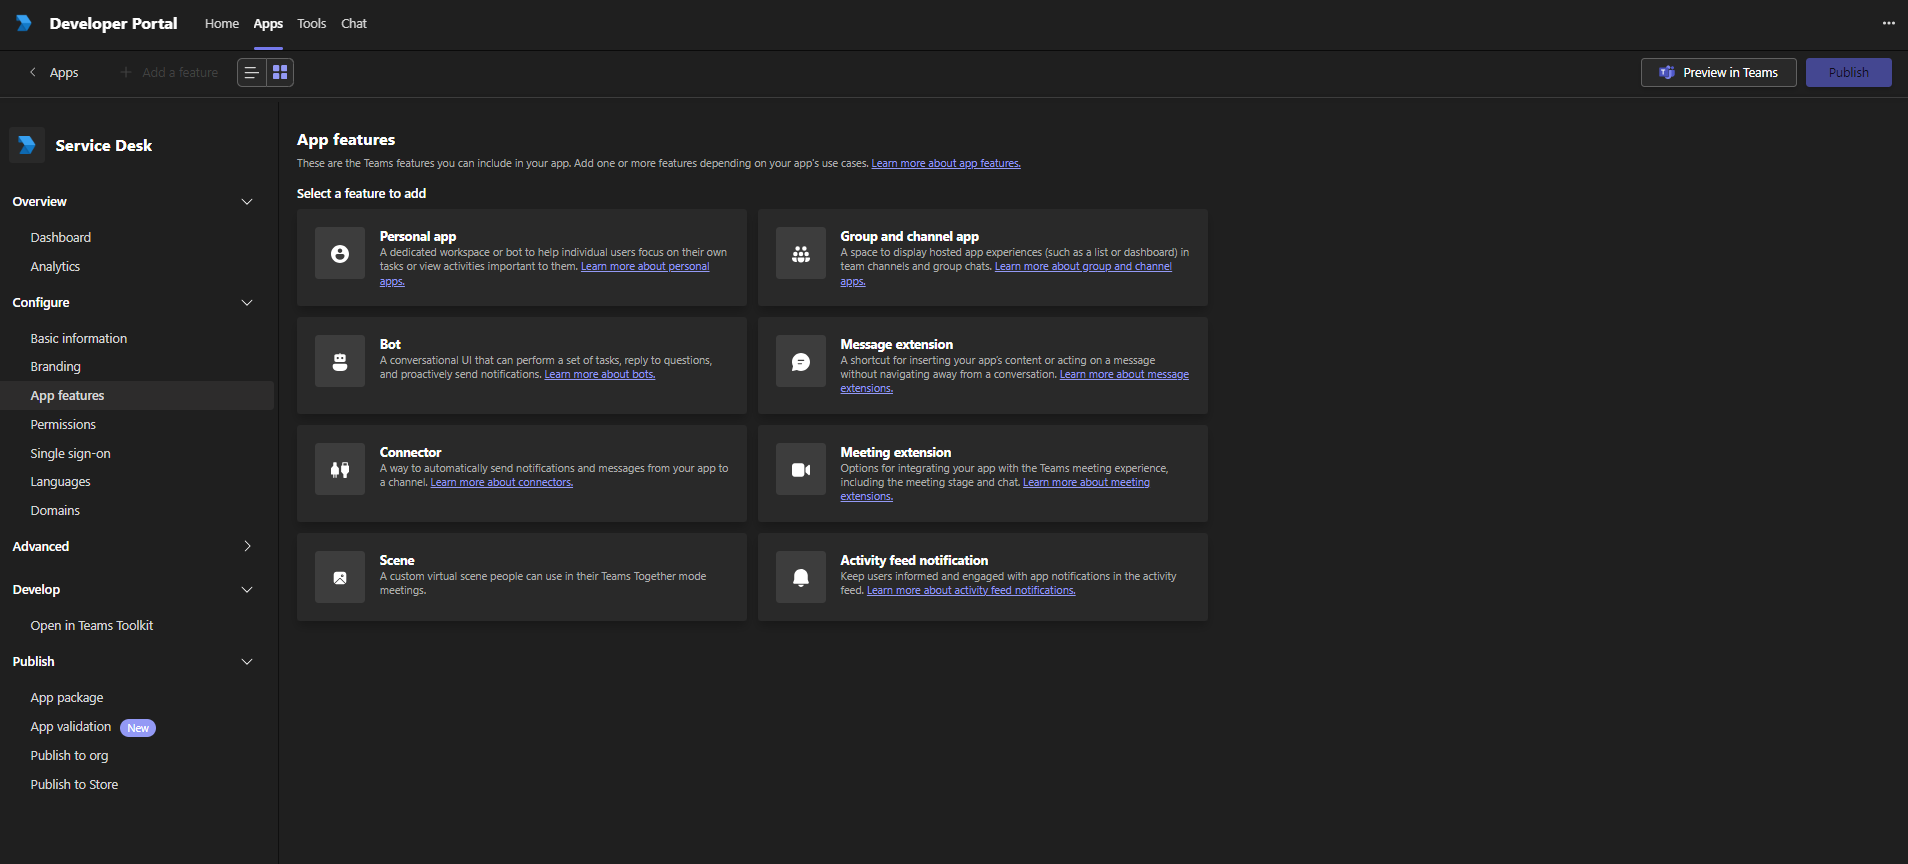
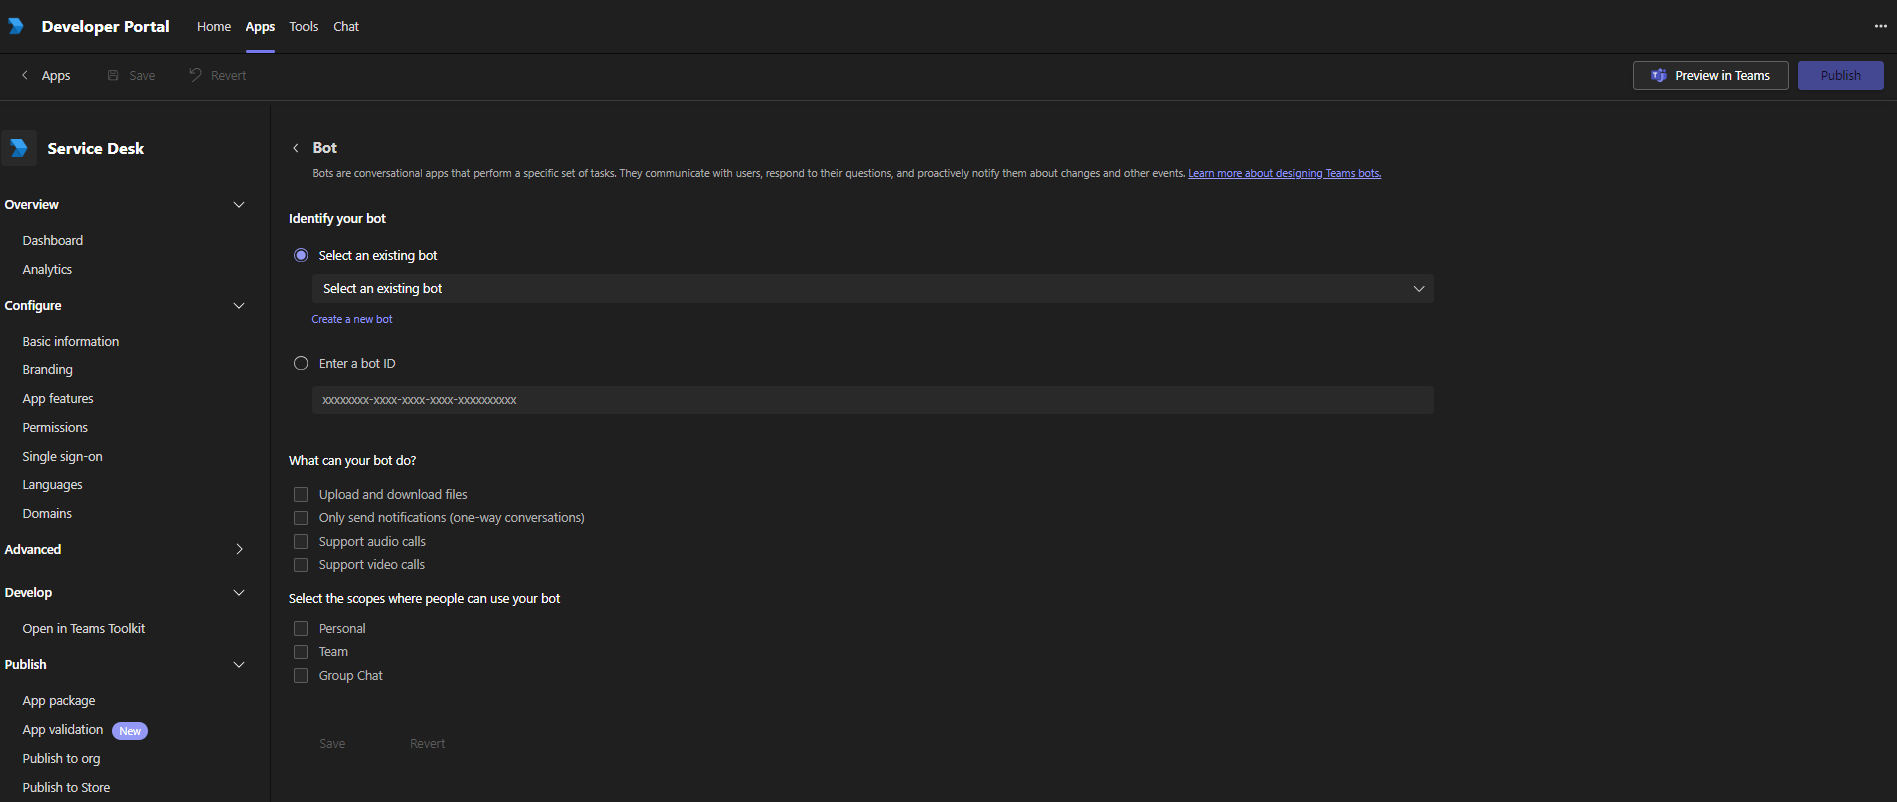
Then add a bot in the „App Features“.
 You can now enter the bot ID under „Enter a bot ID“. This bot ID is the same as the Microsoft App ID that you have already copied from the Azure portal. You must then select „Personal“ under the area selection. Then save it.
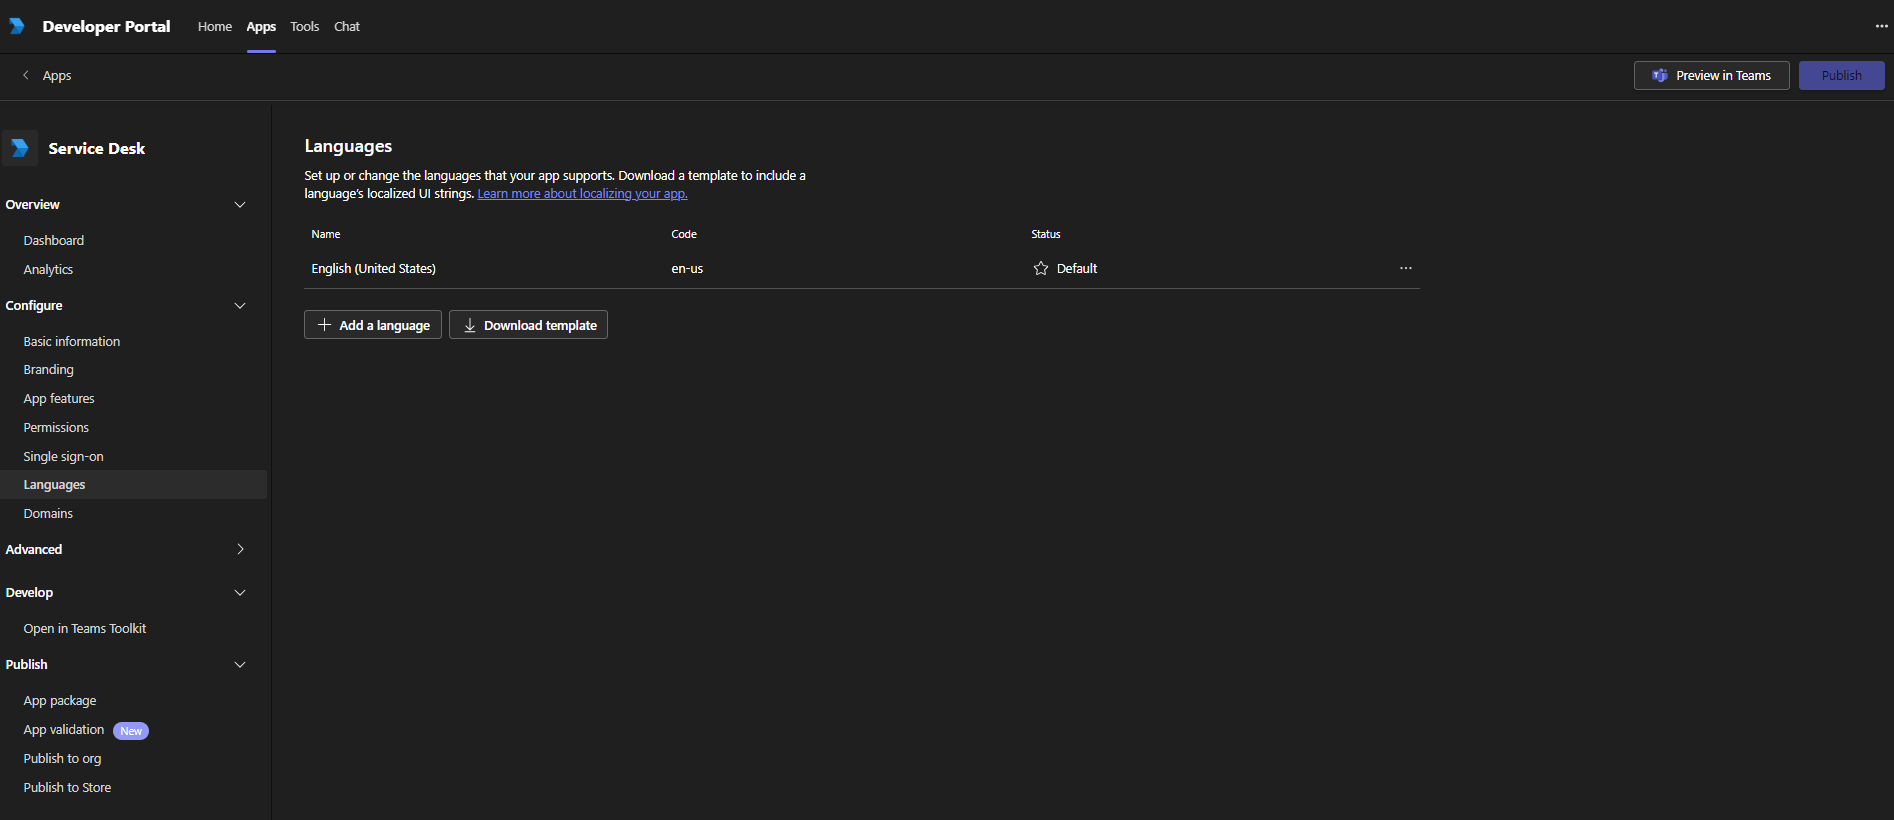
Optionally, you can now add languages that the bot supports. These should match the configured languages in the bot (currently German and English) and the languages that are stored in the welcome relay message in the service desk chat configuration in Matrix42 ESM.
Publish the app using the button in the top right-hand corner. You can then specify whether you want to publish the app in your organization or in the Teams Store.
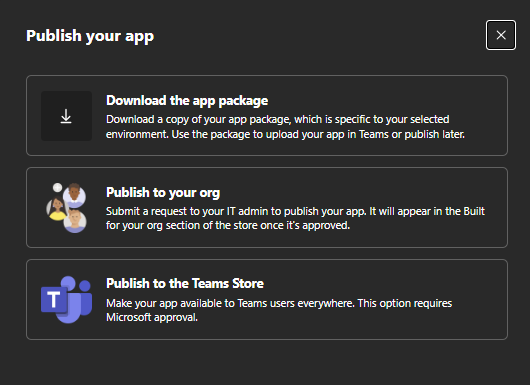
If you want to publish the app in your organization, you may need to publish and unblock the app separately in the Microsoft Teams Admin Center under „Teams Apps“ -> „Manage Apps“. Please note that these changes may only arrive in Teams after half a day. It may also be necessary to restart Teams.
Alternatively, you can test the app for yourself by clicking on „Download the app package“ when publishing. Then follow the following guide from Microsoft (Uploading your custom app – Teams | Microsoft Learn).
Configuration of a Windows service
Note: The relay can be installed on the app server, but at least the virtually created folder must be accessible from Azure. Please implement appropriate firewall rules / routes.
Follow the steps below to configure the relay as a Windows service.
Configure IIS – Install Application Request Routing 3.0 – Teams Relay
Install Application Request Routing (ARR for short) directly in IIS via the Web Platform Installer or download it from Microsoft (z.B.Download Microsoft Application Request Routing 3.0 (x64) from Official Microsoft Download Center) and install it.
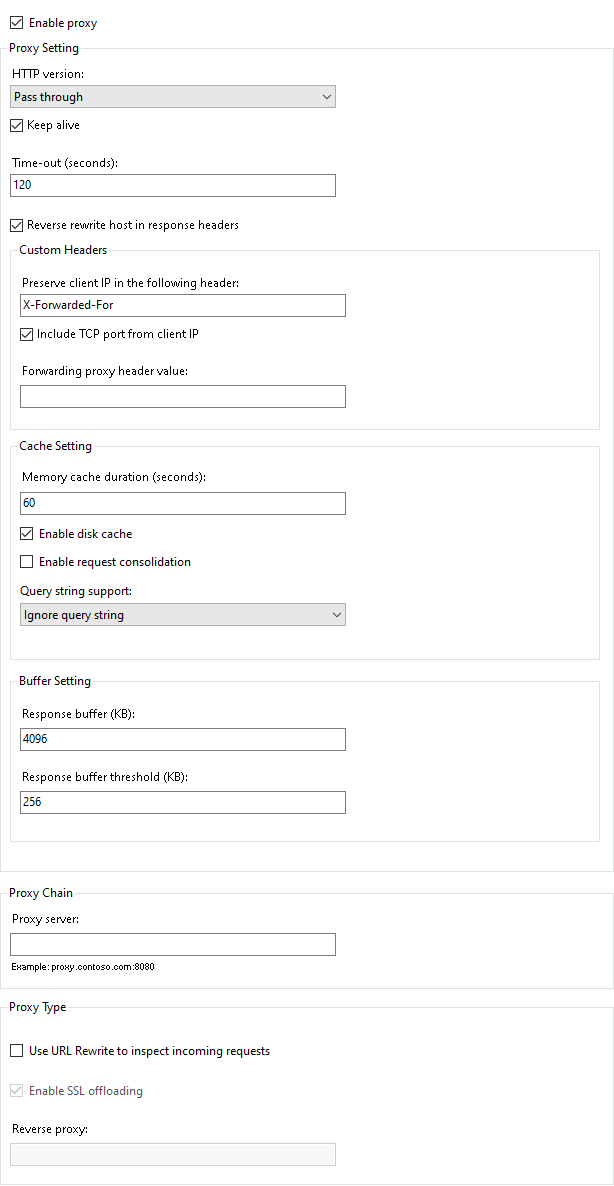
To be able to configure ARR, first go to the server and
ARR 3.0 is configured in IIS on the properties page of the server:
Configure IIS – Create and configure virtual folder – Teams Relay
Now create a new virtual folder under the server’s default website. (e.g. /teams)
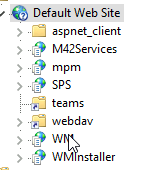
Activate „Anonymous Authentication“ under „Authentication“ in this virtual folder.

Now add a new inbound rule to URL Rewrite and configure it as shown in the following image.
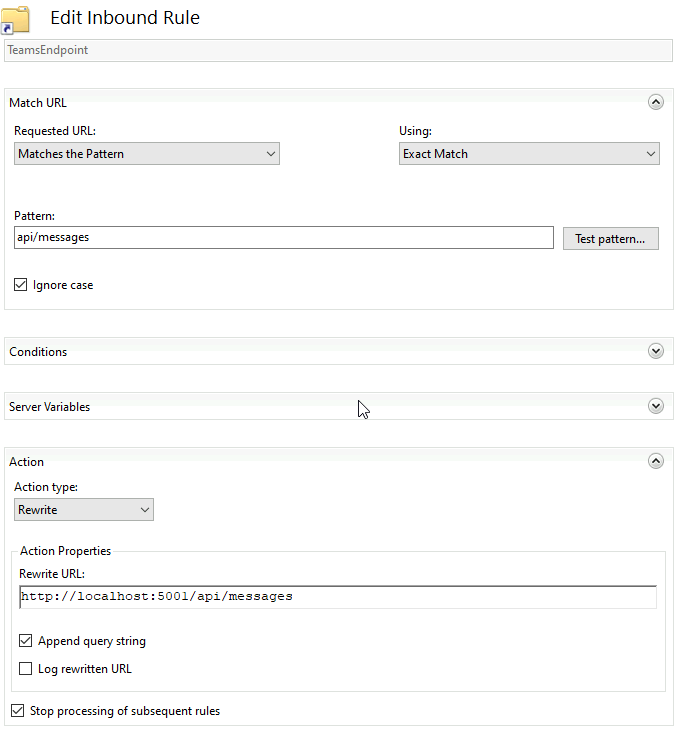

Note: instead of the port used here, another port can also be used, then adjust the Relay Config accordingly.
The web.config of the virtual folder should now look like this:
<?xml version="1.0" encoding="UTF-8"?>
<configuration>
<system.webServer>
<rewrite>
<rules>
<rule name="TeamsEndpoint" patternSyntax="ExactMatch" stopProcessing="true">
<match url="api/messages" />
<action type="Rewrite" url="http://localhost:5001/api/messages" appendQueryString="true" />
</rule>
<!-- Uncomment if relay is not running on app server <rule name="RelayEndpoint" patternSyntax="ExactMatch" stopProcessing="true"><match url="relay" /><action type="Rewrite" url="http://localhost:5000/relay" appendQueryString="true" /></rule> -->
</rules>
</rewrite>
<security>
<authentication>
<anonymousAuthentication enabled="true" />
</authentication>
</security>
</system.webServer>
</configuration>
Install Service Desk Relay
- Extract received relay archive:
- Extract the archive to any location, e.g. ‚C:/ServiceDeskChatRelay‘
- Open PowerShell as administrator:
- Navigate to the extracted folder and execute the following command to install the service:
$binaryPath = Resolve-Path .\Labtagon.ServiceDeskChat.Relay.exe

$workingFolder = [System.IO.Path]::GetDirectoryName($binaryPath)

sc.exe delete LabtagonServiceDeskChatRelay

sc.exe create LabtagonServiceDeskChatRelay binpath=“$binaryPath –contentRoot ‚$workingFolder'“ start=auto
- Configure the relay:
- Generate a relay secret of your choice (e.g. using a password generator). You then store this in appsettings.JSON and in your Maztrix42 DWP.
- Set the required fields in the appsettings.JSON of the unpacked Service Desk Chat Relay.
- Required for the external website relay:
- „ExternalChatRelay:Enabled“: true
- „ListenEndpoint“: e.g.: „http://0.0.0.0:5001“
- „RelaySecret“: a self-made secret
- „AllowedOrigins“: List of all addresses that should have access to the relay’s resources. For example: „http://0.0.0.0:5001“. It is also possible to set a wildcard.
- Required for the Microsoft Teams Relay:
- „TeamsRelay:Enabled“: true
- „RelaySecret“: a self-made secret
- „ListenEndpoint“: e.g.: „http://0.0.0.0:5001“ (use port defined in IIS)
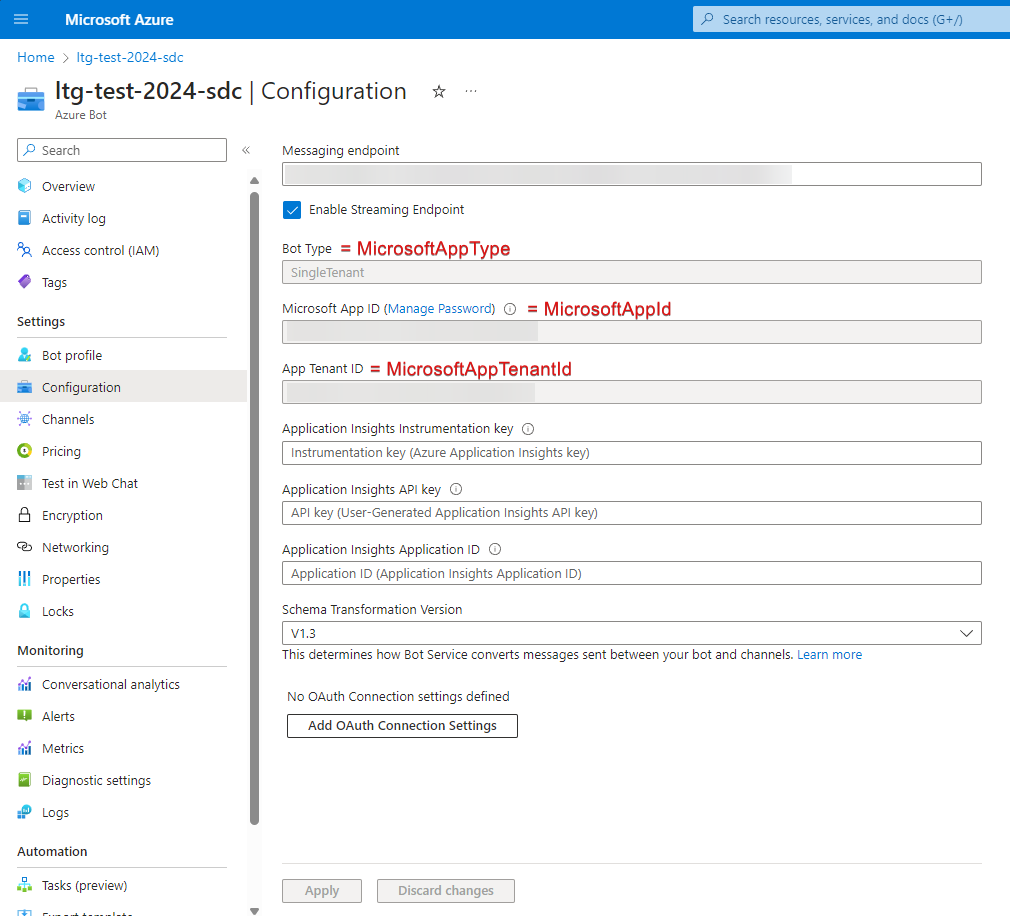
- „MicrosoftAppId“,
- „MicrosoftAppTenantId“,
- „MicrosoftAppType“
- This information („MicrosoftAppId“, „MicrosoftAppTenantId“, „MicrosoftAppType“) can be found in the Azure Portal (https://portal.azure.com/) from your Azure Bot.

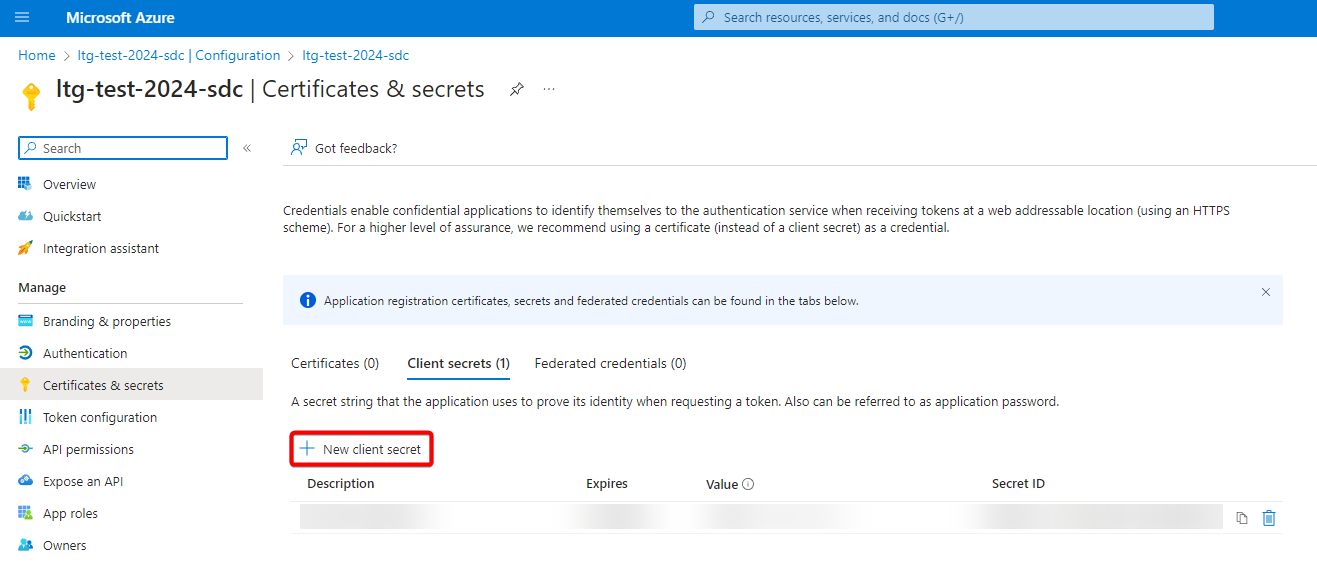
- „MicrosoftAppPassword“: Can only be copied directly when created on the Azure portal page. Otherwise, you can create a new app password. To do this, go to your bot in the Azure Portal under Configuration and click on „Manage password“ under Microsoft App ID. There you can create a new client key. Note that you can only copy this client key after creating it directly.
- Additional configuration options (configurable in the appsettings.json):
- „KeepAliveInterval“: This is the time interval at which the server sends a „Keep-Alive“ message to the client to keep the connection active, even if no data is exchanged.
- „ClientTimeoutInterval“: This interval defines how long the server waits before considering a client connection as timed out and closing it due to inactivity.
- „HandshakeTimeout“: This is the amount of time the server waits to complete a successful handshake (e.g., during the establishment of a secure connection). If the handshake isn’t completed within the given time (e.g., due to network issues or failed authentication), the connection will be terminated.
- „ClientServerTransportType“: Defines the transport type of requests and responses from the relay to the Matrix42 system. The transport types are defined under this link. You can choose between the following transport types:
- WebSockets: 1
- ServerSentEvents: 2
- LongPolling: 4
- Start the Windows service
A „Log“ folder containing the log files is created directly in the relay folder if the start is successful.
Configure the Docker Containers
The configuration of the Docker container is documented on the following page (labtagon/service-desk-chat-relay – Docker Image | Docker Hub).
Please note that if you use „labtagon/service-desk-chat-relay:latest“, the image will be updated automatically as soon as we release a new version.
Configure your Matrix42 DWP
Further information on the configuration of the relay in your Matrix42 DWP can be found at „Service Desk Chat Configuration“ .
Formatting options in messages
The following formatting options and file attachments are possible between Microsoft Teams and your Matrix42 environment, or between your website and your Matrix42 environment:
| Styles | M42 ESM -> Microsoft Teams | Microsoft Teams -> M42 ESM | M42 ESM -> Your Website | Your Website -> M42 ESM | Notizen |
|---|---|---|---|---|---|
| Bold | ✓ | ✓ | ✓ | ❌ | |
| Italic | ✓ | ✓ | ✓ | ❌ | |
| Underline | ❌ | ✓ | ✓ | ❌ | |
| Change text color | ✓ | ✓ | ✓ | ❌ | |
| Background color | ✓ | ✓ | ✓ | ❌ | |
| Indent tab | ❌ | ✓ | ✓ | ❌ | |
| Emojis | ✓ | ✓ | ✓ | ✓ | |
| Gifs | ❌ | ✓ | ❌ | ❌ | |
| Images | ✓ | ❌ | ❌ | ❌ | maximum image size: 15MB |
| Videos | ❌ | ❌ | ❌ | ❌ | |
| Links | ✓ | ✓ | ✓ | ❌ |
Service Desk Chat Relay public API Endpoints
You can access the endpoints via the address of your relay + „/sdc/“. Below you will find the API endpoints that are relevant to you.
Health Check
- „/health“
- Returns „OK“. Used to check if the relay is reachable.
CheckRelayConnections
- „/checkRelayConnections“
- Returns „OK“ if there is only one active connection to the Matrix42 system.
- Throws an error if there is no connection or more than one connection to the Matrix42 system.
